I really enjoyed strolling through the pages of Skip To My Lou...I have bookmarked SO MANY PAGES!
Here are some more goodies I want to keep as reminders of all the crafting fun we can have:
Remember making these in school? C'mon now...I'm not that old, and I can't be the only one who ever did this!
Crayon Shaving Pictures! She made hearts, but the possibilities are endless...
And homemade window clings...again, endless design possibilities here. Holiday decorations, sure...but anything your child likes to create could be done. Oh, the gift ideas for Grandparents!
Wednesday, February 24, 2010

Creative Fun: Oobleck, GAK Slime and Moon Sand
Making Oobleck:
This stuff is amazing. My boys (okay and me too) were totally taken with this goo. Oobleck defies Newton's third law of motion--for every action, there is an equal and opposite reaction. If you quickly smack oobleck with your hand it immediately turns into a solid, instead of splashing or moving. If you slowly move oobleck it reacts like a liquid. Needless to say our oobleck took a lot of fist smacking! Our kitchen was filled with lots of "Wow," "Cool," wide eyes of amazement and much laughter!"
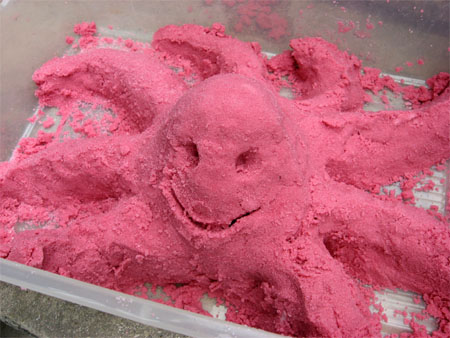
Making Moon Sand:
You can experiment with the ingredients until you get it exactly how you like it. Be careful though, it is very easy to get sandy oobleck! When finished playing, cover and store. Next time you play add a few tablespoons of water if it needs to be moistened.
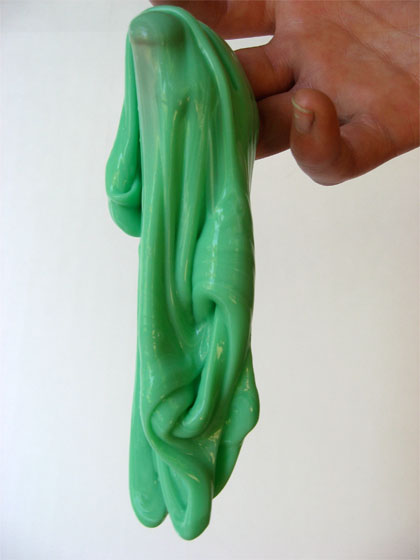
Making GAK Slime:

This stuff is amazing. My boys (okay and me too) were totally taken with this goo. Oobleck defies Newton's third law of motion--for every action, there is an equal and opposite reaction. If you quickly smack oobleck with your hand it immediately turns into a solid, instead of splashing or moving. If you slowly move oobleck it reacts like a liquid. Needless to say our oobleck took a lot of fist smacking! Our kitchen was filled with lots of "Wow," "Cool," wide eyes of amazement and much laughter!"
Making Moon Sand:
You can experiment with the ingredients until you get it exactly how you like it. Be careful though, it is very easy to get sandy oobleck! When finished playing, cover and store. Next time you play add a few tablespoons of water if it needs to be moistened.
Making GAK Slime:
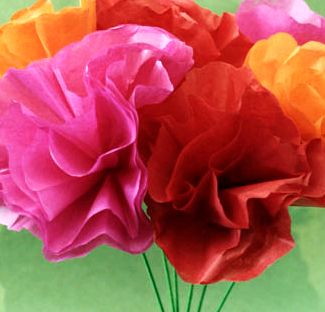
Beautiful Tissue Paper Flowers
Are these not pretty...and fun? I found the pictoral over at Skip To My Lou, as part of her Bloggy Book and Craft-a-Thon pages.
We can't wait to make some and decorate for spring...it's coming you know. Really. Spring is just around the corner!
Lauren and Derek of the Curiosity Shoppe are guest posting today to help promote the Read to Feed Project! Everything you will find at their shop in San Fransisco is special. They have taken great care to fill their shop with items and ideas that will delight, amuse and inspire. You will also find them each Wednesday at Design Sponge sharing creative and useful projects. Be sure to check them out! They will amaze you with their creativity!
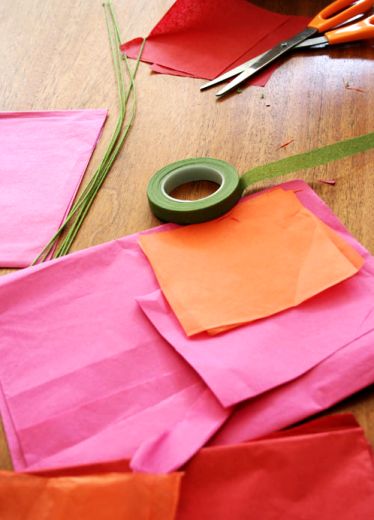
Ingredients:
Colored tissue paper
Scissors
Floral wire
Floral tape

How-to:

1. For each flower you will need 3-4 squares of colored tissue paper, measuring about 5" square. Stack up the paper and fold into quarters.
2. Cut a rounded edge with your scissors, adding little wavy scallops as you cut.
3. Bend the top of one of your pieces of floral wire into a loop and thread the opposite end through the center of your stack of tissue, pushing it all the way up the floral wire until it catches on the loop.
4. Wind a 4" piece of floral wire around the base of the flower, making sure to catch a bit of the paper and continuing down the stem 1"-2".
5. Gently separate the layers of tissue paper and crinkle them slightly to create the petals and give the flower some volume.

We can't wait to make some and decorate for spring...it's coming you know. Really. Spring is just around the corner!
Lauren and Derek of the Curiosity Shoppe are guest posting today to help promote the Read to Feed Project! Everything you will find at their shop in San Fransisco is special. They have taken great care to fill their shop with items and ideas that will delight, amuse and inspire. You will also find them each Wednesday at Design Sponge sharing creative and useful projects. Be sure to check them out! They will amaze you with their creativity!
Ingredients:
Colored tissue paper
Scissors
Floral wire
Floral tape
How-to:
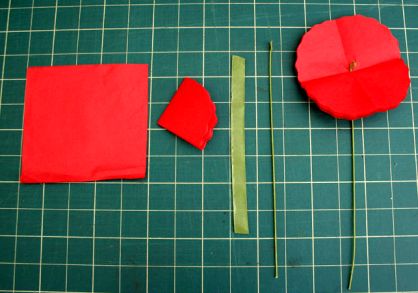
1. For each flower you will need 3-4 squares of colored tissue paper, measuring about 5" square. Stack up the paper and fold into quarters.
2. Cut a rounded edge with your scissors, adding little wavy scallops as you cut.
3. Bend the top of one of your pieces of floral wire into a loop and thread the opposite end through the center of your stack of tissue, pushing it all the way up the floral wire until it catches on the loop.
4. Wind a 4" piece of floral wire around the base of the flower, making sure to catch a bit of the paper and continuing down the stem 1"-2".
5. Gently separate the layers of tissue paper and crinkle them slightly to create the petals and give the flower some volume.
Subscribe to:
Posts (Atom)